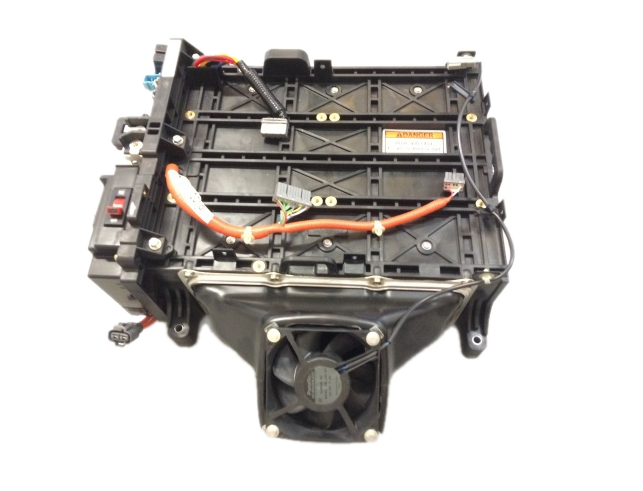
Upgrading Honda Insight IMA Battery
A few months ago while driving my commuter car - a 2000 Honda Insight, I received the dreaded IMA light. For those that don’t drive this car, the IMA light indicates that the main hybrid vehicle battery is failing at capacity. In Georgia, this light means you will not pass State emissions which is a requirement. Additionally, you lose a tremendous amount of power, which is kind of the point of the electric motor.
I got repair quotes but they were quite excessive - to the tune of thousands of US dollars. I looked at purchasing a new IMA battery and replacing it myself, but it was still $2,500 USD for that alone! I did some research on various forums and I determined that in theory I could buy USED IMA battery cells and replace the cells that weren’t holding a charge very well. I could do this for a few hundred dollars and quite a bit of labor. Well, against all recommendations I decided to go the DIY route.
NOTICE
Do not attempt to do this or use any of this material as a reference or how-to guide. This information is provided for entertainment purposes only. Please consult a professional for any work like this.
SAFETY FIRST
During this project I observed every safety precaution. What is not pictured is me wearing professional Electrician’s gloves while working and transporting. Please do not attempt this yourself. I cannot take any responsibility if you hurt yourself.
Here are some pictures of the “upgrade” that I did.
This is my commuter car: A 2000 Honda Insight hybrid that gets 50+ MPG
The Honda Insight is a two seater hybrid compact. It’s very similar to the old Honda CRX, but the rear hatch is smaller and it houses a large 144v DC battery pack called ‘MIMA’. In order to access the MIMA, I had to remove the rear carpeting and the spare tire wheel well. I didn’t take a lot of pictures of removing the battery, but I recall several aluminum plates secured by sheet metal screws (I think). It was a lot of work and the battery pack itself is incredibly heavy. I has two plastic handles built in which were helpful but this would definitely been much easier with two people.
Moving in closer, there appears to be a warning label.
Yep, there is a label which reads, “You will be killed or hurt.” Zooming in on the label doesn’t seem to make it any less lethal. Sound serious. Let’s keep going.
Here is the IMA Battery Pack on my work table. I probably should have done this in the garage, but since I needed some of my electronics tools like voltmeters and potentially a soldering iron and heat shrink tubing, I decided to haul it upstairs to my office. Did I mention this thing is INCREDIBLY HEAVY I don’t recall the weight but it’s at least 100 lbs (45 kilograms).
Upon closer inspection the battery pack itself also has a label. This one is much less verbose and much more pointed. At least they gave me handles to help with carrying this thing.
This is the backside of the MIMA. I didn’t touch anything on this side. I can see a large inline fuse and resistor along with some vent tubes that I presume are thermal.
This is the other side of the battery pack. This is the end that I worked on. I removed the four large corner bolts with a socket. The battery cells have hex heads on them that need to be removed as well.
After removing the bolts, I was able to finesse the orange plate lose. There were small insulators / pads that cover each cell end. You can see one as a ring in the lower right corner on the table.
Here is a more detailed view of the cover plate. I forgot to mention that there are little tabs poking through. These also had to be gently removed and finessed through their mating holes.
Here you can see the individual cells that make up the full battery pack. The small green tabs on each cell are thermistors. They measure the cell temperature and report it up to the hybrid controller / ICU. They throw a fault if a single cell overheats or otherwise fails.
This is an individual cell. It’s comprised of six 1.2 volt batteries. They’re encased together in heat shrink tubing with a thermistor running the entire length.
After removing the cells, I had to test each of them on my bench desk. This was a time consuming process as I had to discharge and recharge them a few times. The goal was to find the weakest cells from my pack and replace them with the newer cells from the used pack that I purchased on eBay. Basically, I had to test all of the sticks from two MIMA packs and take the best and put them in the MIMA battery housing.
Installation was the opposite of removal.
Please feel free to comment below 👇 if you have any questions or comments.
Upgrading Honda Insight IMA Battery
https://chrisbergeron.com/2014/07/04/Upgrading-Honda-Insight-IMA-Battery/


